Network Throughput Testing with iPerf
Should you want to test your througput between two points in your network, you’ll need a tool like iPerf to do so. This guide will show you how to get the client and server up and running, as well as demonstrate the proper usage.
When running a throughput test, you’ll want to be as close as possible to the path you’re testing as you can be. For instance, if you’re testing the WAN link between your CO and a remote school, you”ll want to be just behind the core switch/router at each location. Avoid “obstacles” such as VoIP phones or other devices that could impact actual results. You’ll also want to avoid running iPerf on a virtual machine, as the virtual networking stack will likely affect your results.
iPerf3 Installation
Windows 10 / Server
Visit this page and download the latest version for Windows, which is 3.9 as of this writing. Once the zip file is downloaded, right click the file and click Extract All. Follow the Windows extraction wizard and note where you’ve extracted the files, such as C:\Users\<yourname>\Downloads\.
macOS
If you’re on macOS, the easiest method to get iPerf is to install Homebrew by following the instructions here. Once Homebrew is installed, you’ll run the following from the Terminal app:
1
$ brew install iperf3
Linux
On Linux, you can install iPerf right from the package manager.
Fedora / CentOS / Redhat
1
$ sudo dnf install -y iperf3
Ubuntu / Debian
1
$ sudo apt install -y iperf3
Starting Up the Server
You’ll likely want to run the iPerf server on a device that you can leave stationary, such as a server, workstation or even a laptop located in your main server room. If this will be a permanent server, assigning a static IP address will ensure you always know where to find it on the network.
Windows
Open up cmd.exe1 and type the full path to the location where you extracted iPerf to earlier, using the -s option to start the server.
1
> 'C:\Users\mcnc\Downloads\iperf3.9_64\iperf3.exe' -s
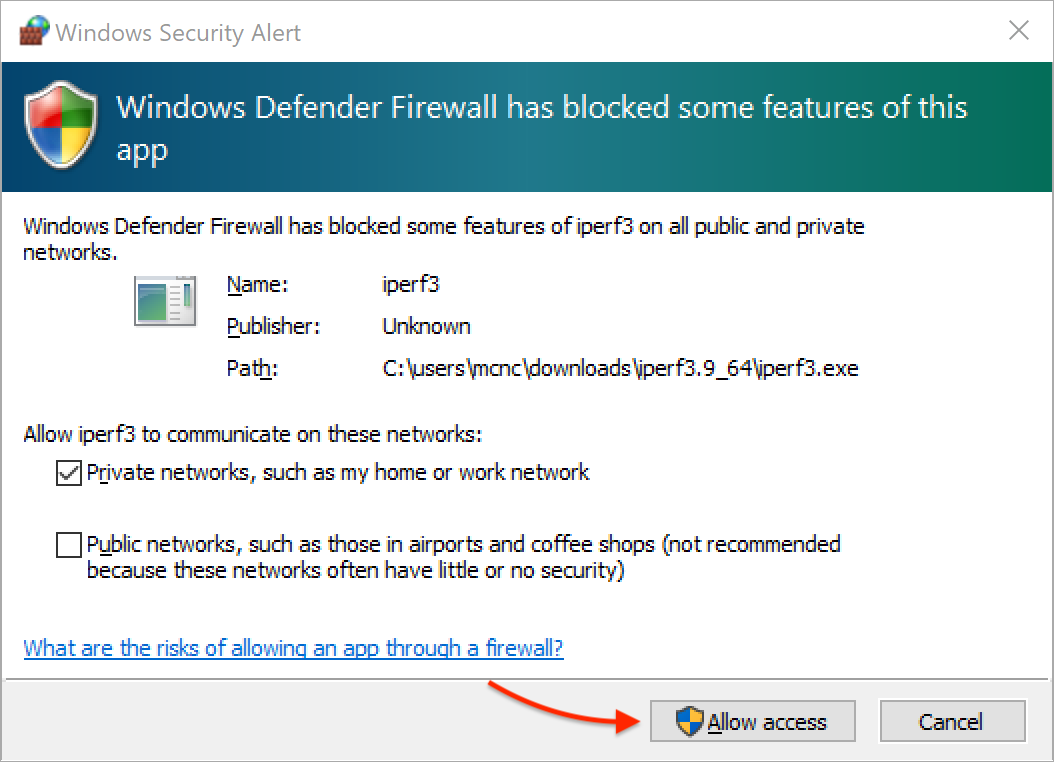
At this point you may see the firewall warning below. This is normal, as you need to allow access to the port on the device where iPerf is running. By default, this is port 5201/tcp. Simply click Allow access on this warning.
macOS / Linux
Open a terminal session, and then run iPerf with the -s option.
1
$ iperf3 -s
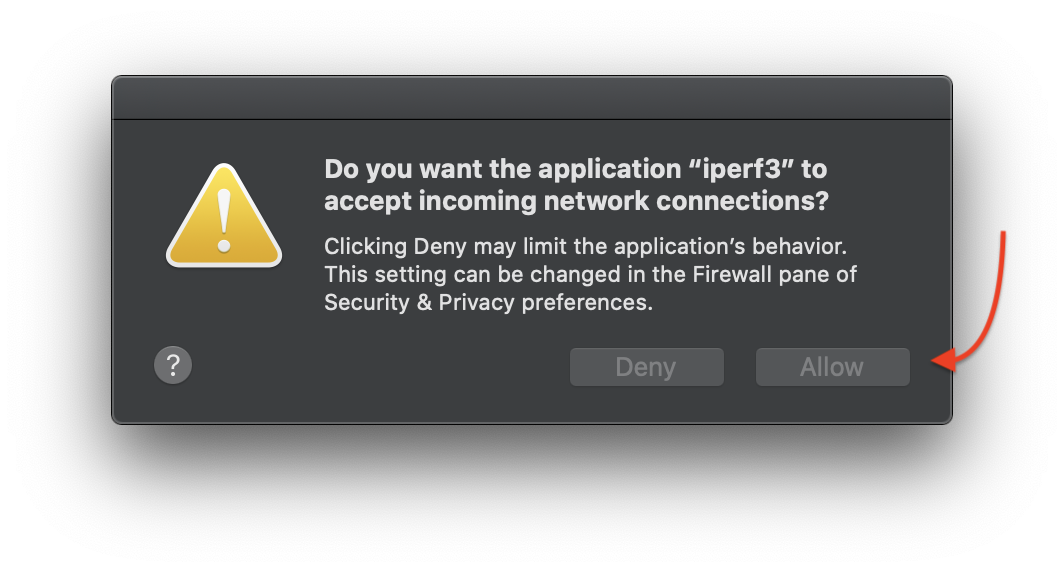
On macOS, you may see the following firewall warning. This is normal, as you need to allow access to the port on the device where iPerf is running. By default, this is port 5201/tcp. Simply click Allow on this warning.
If you see the following output, the server is running and listening on port 5201.
1
2
3
-----------------------------------------------------------
Server listening on 5201
-----------------------------------------------------------
Starting a Throughput Test on the Client
Download or install like we covered earlier. iPerf, by default, sends data to the server. This is your upload, or outbound, throughput. For the internal network, this may be sufficient for your tests. We’ll cover the “reverse,” or inbound, test in a moment.
Windows
Open up cmd.exe1 and type the full path to the location where you extracted iPerf to earlier, using the -c option to start the throughput test. In this instance, our server is 192.168.0.10. The test will run for 10 seconds by default, pushing as much data as possible.
1
> 'C:\Users\mcnc\Downloads\iperf3.9_64\iperf3.exe' -c 192.168.0.10
macOS / Linux
Open a terminal session, and then run iPerf with the -c option to start the throughput test. In this instance, our server is 192.168.0.10. The test will run for 10 seconds by default, pushing as much data as possible.
1
$ iperf3 -c 192.168.0.10
If you see the following output, the client has successfully completed the test.
1
2
3
4
5
6
7
8
9
10
11
12
13
14
15
16
17
18
19
Connecting to host 192.168.0.9, port 5201
[  5] local 192.0.2.101 port 52985 connected to 192.168.0.9 port 5201
[ ID] Interval           Transfer     Bitrate
[  5]   0.00-1.00   sec   171 MBytes  1.43 Gbits/sec
[  5]   1.00-2.00   sec   178 MBytes  1.50 Gbits/sec
[  5]   2.00-3.00   sec   177 MBytes  1.49 Gbits/sec
[  5]   3.00-4.00   sec   180 MBytes  1.51 Gbits/sec
[  5]   4.00-5.00   sec   180 MBytes  1.51 Gbits/sec
[  5]   5.00-6.00   sec   180 MBytes  1.51 Gbits/sec
[  5]   6.00-7.00   sec   180 MBytes  1.51 Gbits/sec
[  5]   7.00-8.00   sec   180 MBytes  1.51 Gbits/sec
[  5]   8.00-9.00   sec   180 MBytes  1.51 Gbits/sec
[  5]   9.00-10.00  sec   180 MBytes  1.51 Gbits/sec
- - - - - - - - - - - - - - - - - - - - - - - - -
[ ID] Interval           Transfer     Bitrate
[  5]   0.00-10.00  sec  1.74 GBytes  1.50 Gbits/sec                  sender
[  5]   0.00-10.00  sec  1.74 GBytes  1.50 Gbits/sec                  receiver

iperf Done.
In this example, the client has sent 1.74 GB of data to the server at a rate of 1.50 Gbits/sec
Performing the test in “Reverse”
You may have a need to perform the test recieving traffic from the server to the client. This would be considered a download, or inbound test. To do this, we append the -R option to the command, as demonstrated below.
1
2
3
4
5
6
7
8
9
10
11
12
13
14
15
16
17
18
19
20
21
$ iperf3 -c 192.168.0.10 -R
Connecting to host 192.168.0.9, port 5201
Reverse mode, remote host 192.168.0.9 is sending
[  5] local 192.0.2.101 port 52999 connected to 192.168.0.9 port 5201
[ ID] Interval           Transfer     Bitrate
[  5]   0.00-1.01   sec  14.4 MBytes   119 Mbits/sec
[  5]   1.01-2.00   sec   310 MBytes  2.63 Gbits/sec
[  5]   2.00-3.00   sec   394 MBytes  3.31 Gbits/sec
[  5]   3.00-4.00   sec   461 MBytes  3.87 Gbits/sec
[  5]   4.00-5.00   sec   438 MBytes  3.68 Gbits/sec
[  5]   5.00-6.00   sec   473 MBytes  3.97 Gbits/sec
[  5]   6.00-7.00   sec   449 MBytes  3.77 Gbits/sec
[  5]   7.00-8.00   sec   467 MBytes  3.91 Gbits/sec
[  5]   8.00-9.00   sec   377 MBytes  3.16 Gbits/sec
[  5]   9.00-10.00  sec   392 MBytes  3.28 Gbits/sec
- - - - - - - - - - - - - - - - - - - - - - - - -
[ ID] Interval           Transfer     Bitrate
[  5]   0.00-10.01  sec  3.69 GBytes  3.16 Gbits/sec                  sender
[  5]   0.00-10.00  sec  3.69 GBytes  3.17 Gbits/sec                  receiver

iperf Done.
Performing a Test Through Your Firewall
If you are a member of the NCREN Community and need to perform an iPerf test through your firewall, contact MCNC Support. Performing an outbound test from a client behind your firewall will require an entry in the inside ACL2 on your firewall for port 5201/tcp. Likewise, an inbound test will require a NAT3 between an external address and your client device. You will also need to allow port 201/tcp inbound to the client with an entry in the outside ACL on the firewall as well.